Laser Cutter
Press-fit construction kit
Overview
For this week assignment, we have a team assignment in which we need to characterize our laser cutter plus an individual assignment in which we need to make a parametric press-fit construction kit.
Let's start as usual with My Objective For this project:
- Learn how to deal with our laser cutter and be able to operate it by my own
- learn how to characterize any laser cutter
- learn the concept behind parametric design
- learn how to make parametric design using fusion360
- create a press-fit kit to test my knowledge
I have to finish all of that in two days for someone with an electronics background this wasn't easy at all, but as usual I set a plan and I put it into action to test how far will I go:
Step (1): learn how to characterize any laser cutter "Finishing Team assignments with Aya"
Step (2): learn the concept behind parametric design
Step (3): Learn more about Fusion 360.
Step (4): Creating my press-fit kit.
The Process
Step 1: Charactrize our laser cutter with different TESTS
This time I started differently, I search about the task and I found these two very useful links FabAcademyTutorials - Kamplintfort then I search in the work of previous fab-academy students. I found their work very informative and save me a lot of time.
And I advise you to do the same you can find down below the links to my favorite fab-academy students
I create an initial idea about the steps and tests me and aya should do then we have a meeting and discuss our steps and came up with this simple plan
- (Know Your Machine!) Machine rules - safety instructions - Materials
-
TESTS
-
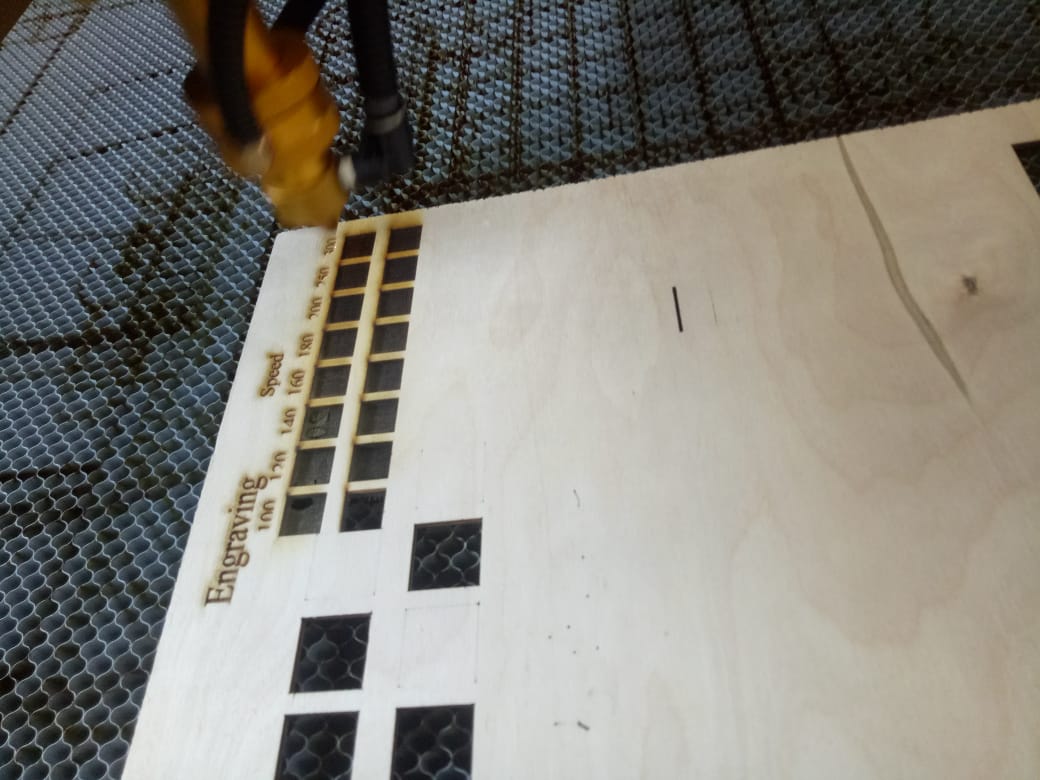
Determine the optimal power and speed settings for our laser cutter
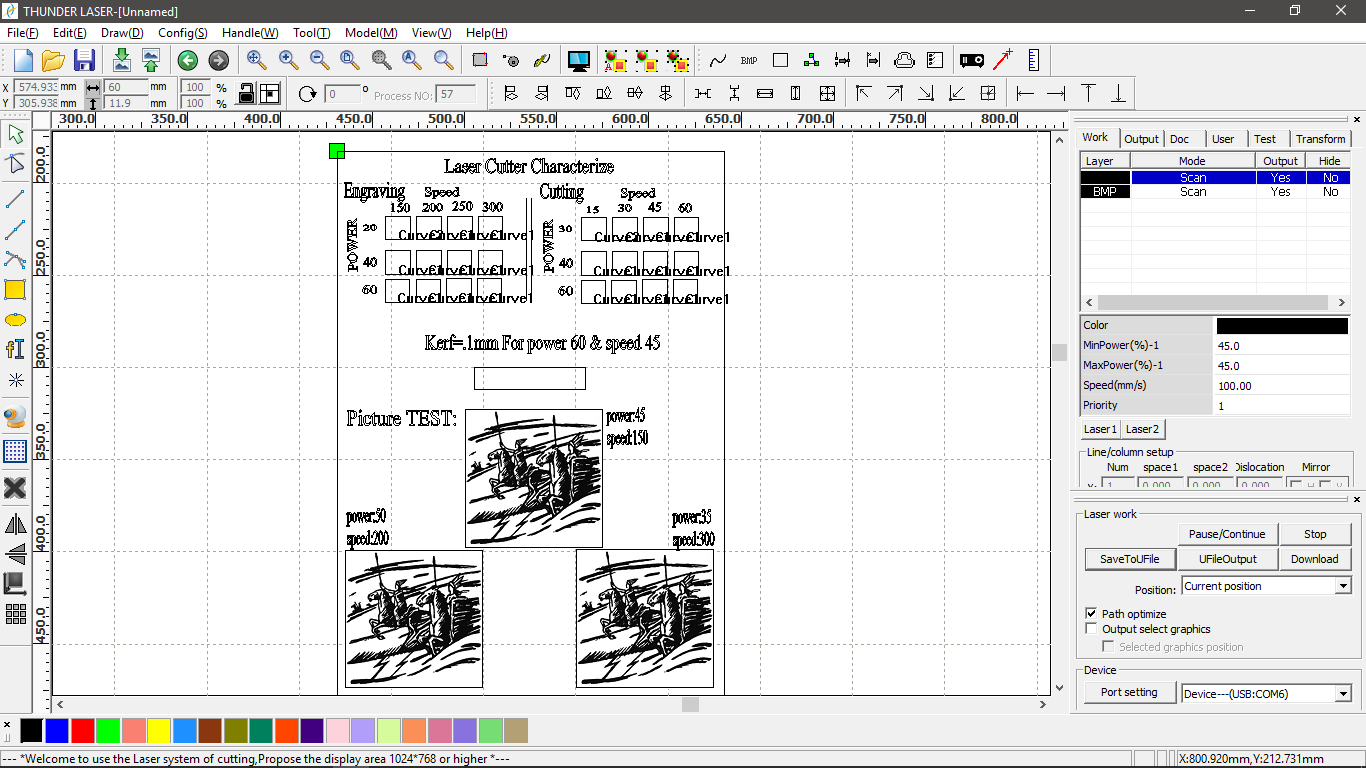
How: draw 18 (20mm x 20mm) squares and tried different combinations of speed and power in order to determine the optimal settings for engraving and cutting the 3mm plywood board.
A Note before we start:
tested the focus by adjusting the bed height to be 6mm from the laser lens
Output: We need to know inEngraving: How dark ? Cutting: How clean and lowest burning ?
-
Kerf test
How: cut 10 rectangles, each one is 1 * 1 cm
-
Picture Engraving
How: Black and white picture, try it at least 3 times with different settings
-
Integration “Optional”
How: One board that have all of our tests.
-
Determine the optimal power and speed settings for our laser cutter
Know Your Machine!
The Laser cutter we used in fablab is LASER EG-1080. It’s a 80/150 WATT with bed dimensions of 80x1000.
It is very important before operating on any machine to check the safety instructions. in our case the instructions are on top of the machine, but here are some general rule to operate it
- Never leave the machine unattended.
- Only cut materials that you can cut with the laser cutter . if you are not sure, ask someone.
- Never forget to turn on the air compressor / filter , otherwise you might destroy the laser. Moreover, after finishing a job wait for a bit before you open the lid.
- Make sure you know what to do in case of fire .
The machine used With different Non-Metal raw materials like:
( Wood – Acrylic – Leather – Cloths – Paper )
For more details about the machine check this link
- All in one laser cutter tests !
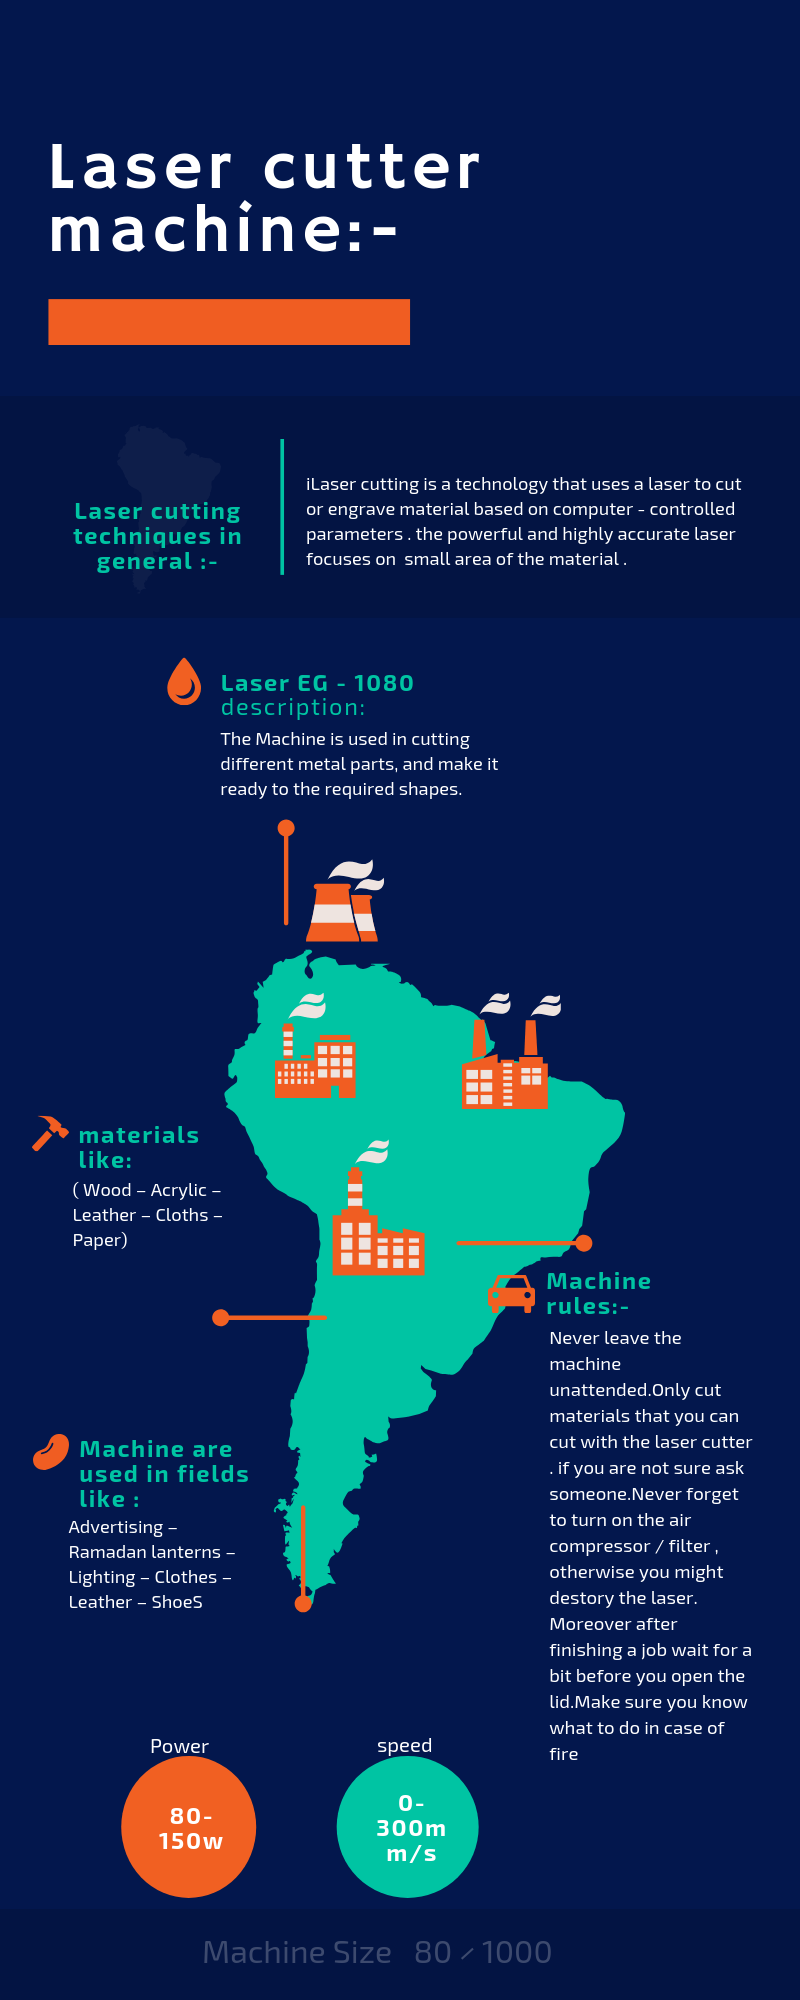
- This infographics created by Aya. you might think it's not perfect, but knowing that she did her best to learn how to create one and came up with this in just one day !!!
Tests
1- Determine the optimal power and speed settings for our laser cutter
To determine the optimal power and speed we created two tests one to cut the wood the other one to scan it using different speeds and powers.
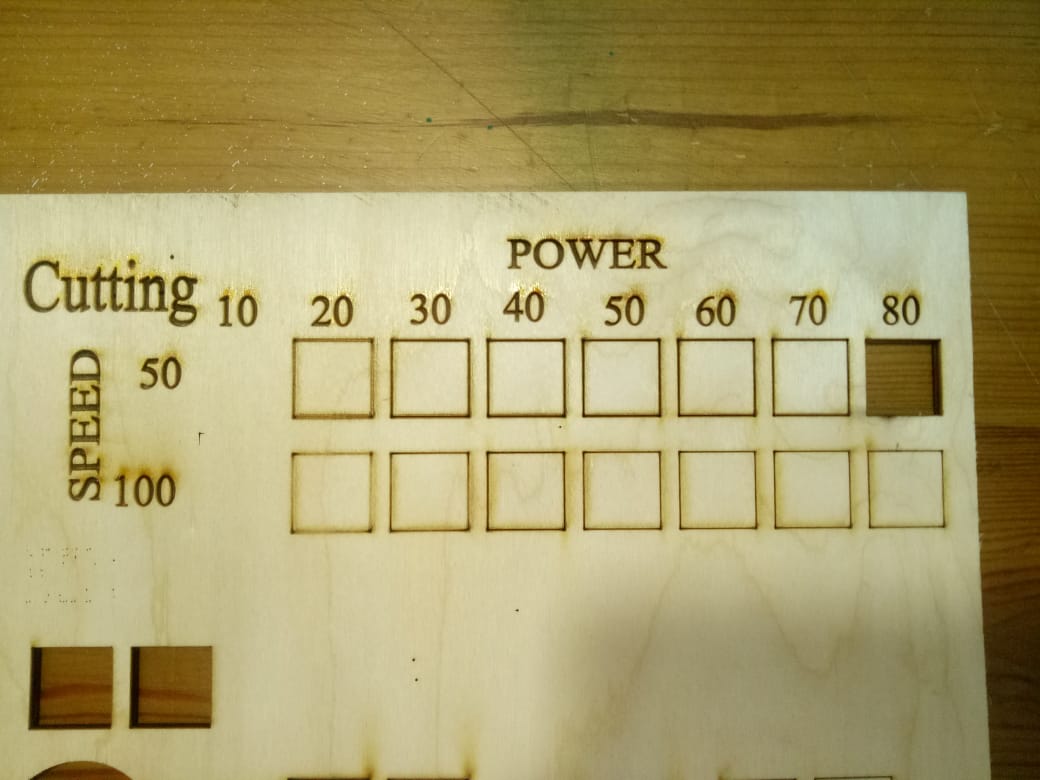
- First trial in which the speed was to fast that it only cuts ont 80p/50s
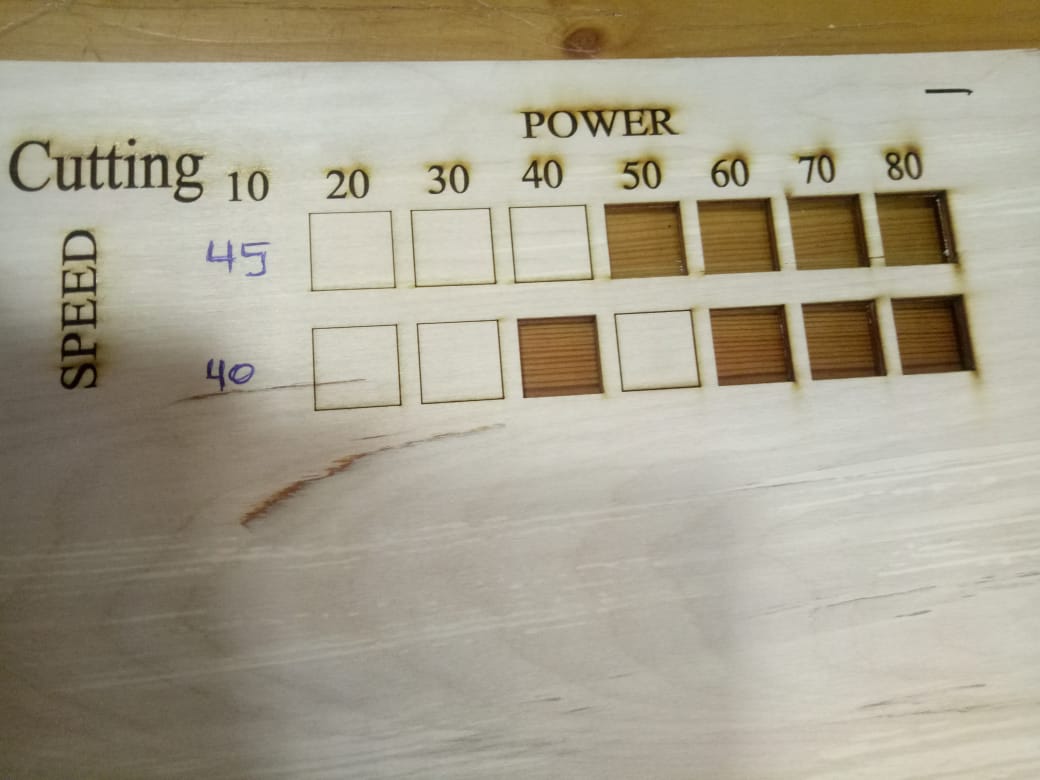
- Second cutting test in which we decrease the speed
- Laser working on our test
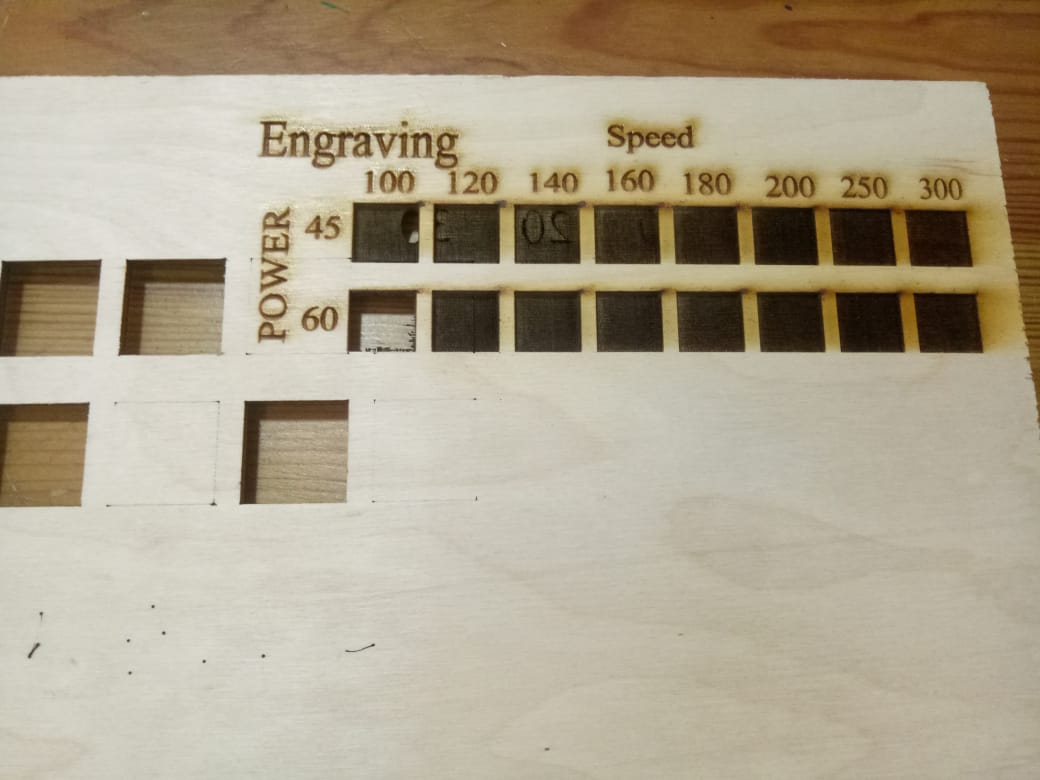
- No much different of color as their is no much different in power
2- Kerf test
The laser burns away a portion of material when it cuts through. This is known as the laser kerf and ranges from 0.08mm – 1mm depending on the material type and other conditional factors. for more info here.
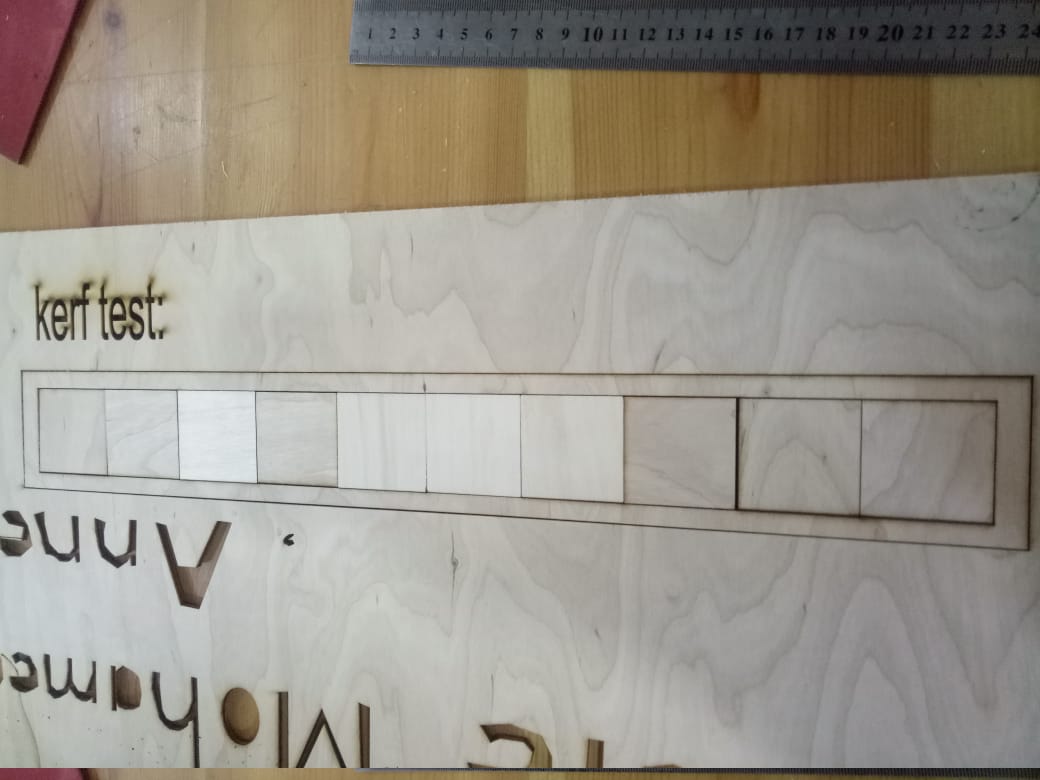

- For power 60 and speed 45 the kerf=0.1mm
3- Picture Test
We change the power and speed of our laser according to our engraving test to change the color.
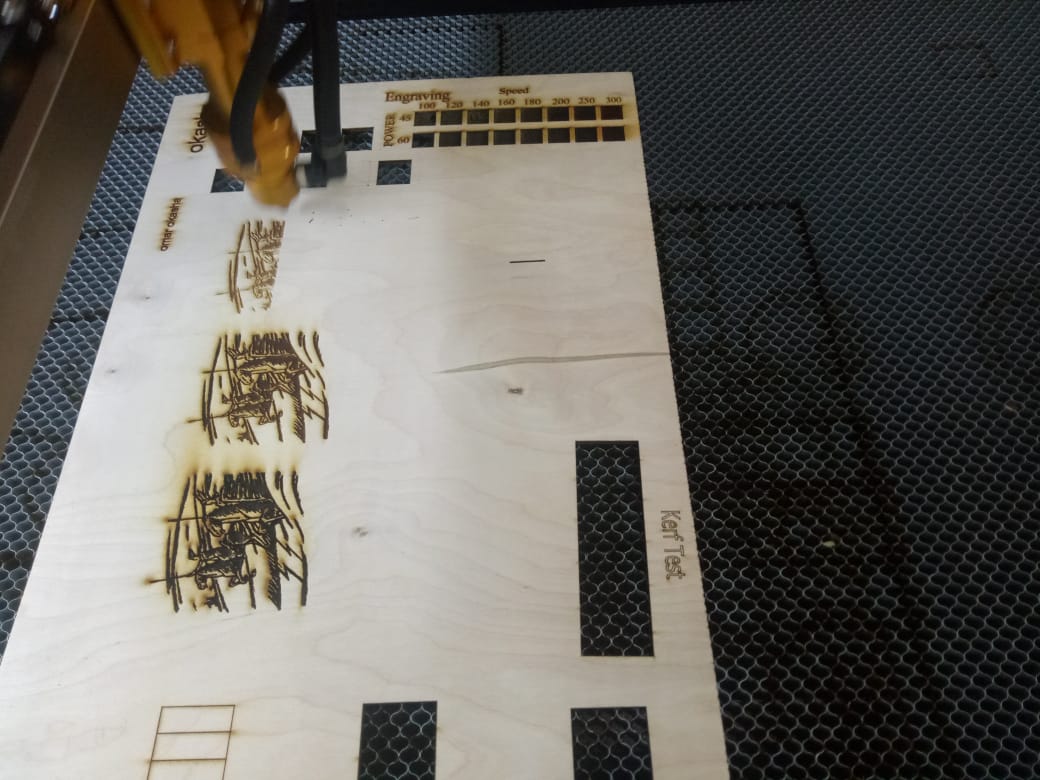
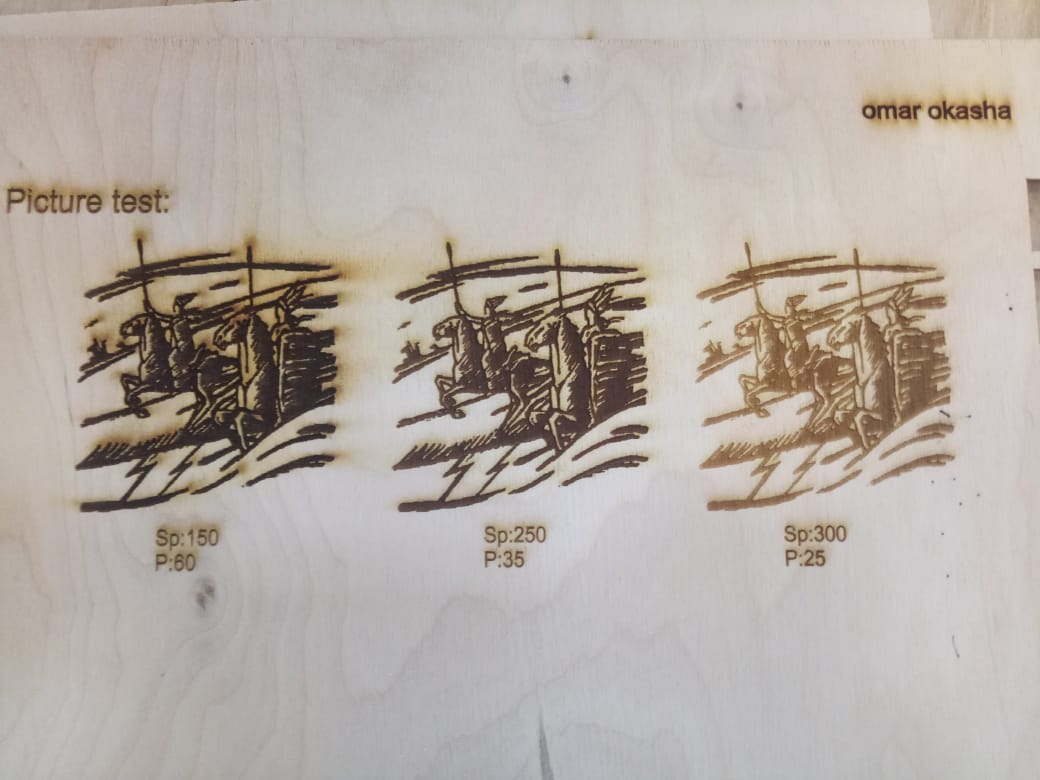
- We think the last two is better than the first one
Step 2: The concept behind parametric design
For someone that come from the electronics and programming world, I wasn't familiar with the concept of parametric design. before that, my steps in mechanical design were so simple "Draw, Dimension, Extrude" this could work just fine until I need to edit my design!!
So the simple way to understand parametric design is to think of as design based on parameters. you could think of Parameters as variables so instead of putting a number in your dimensions, you end up putting the parameters you want.
So now parameters give us the flexibility to edit our design, but in a constrain way that we always end up with something that works.
This Ted Talk was very interesting and help me a lot to visualize and imagine this concept
now it's time to know how we can apply this concept in Fusion 360 through this wonderful tutorials
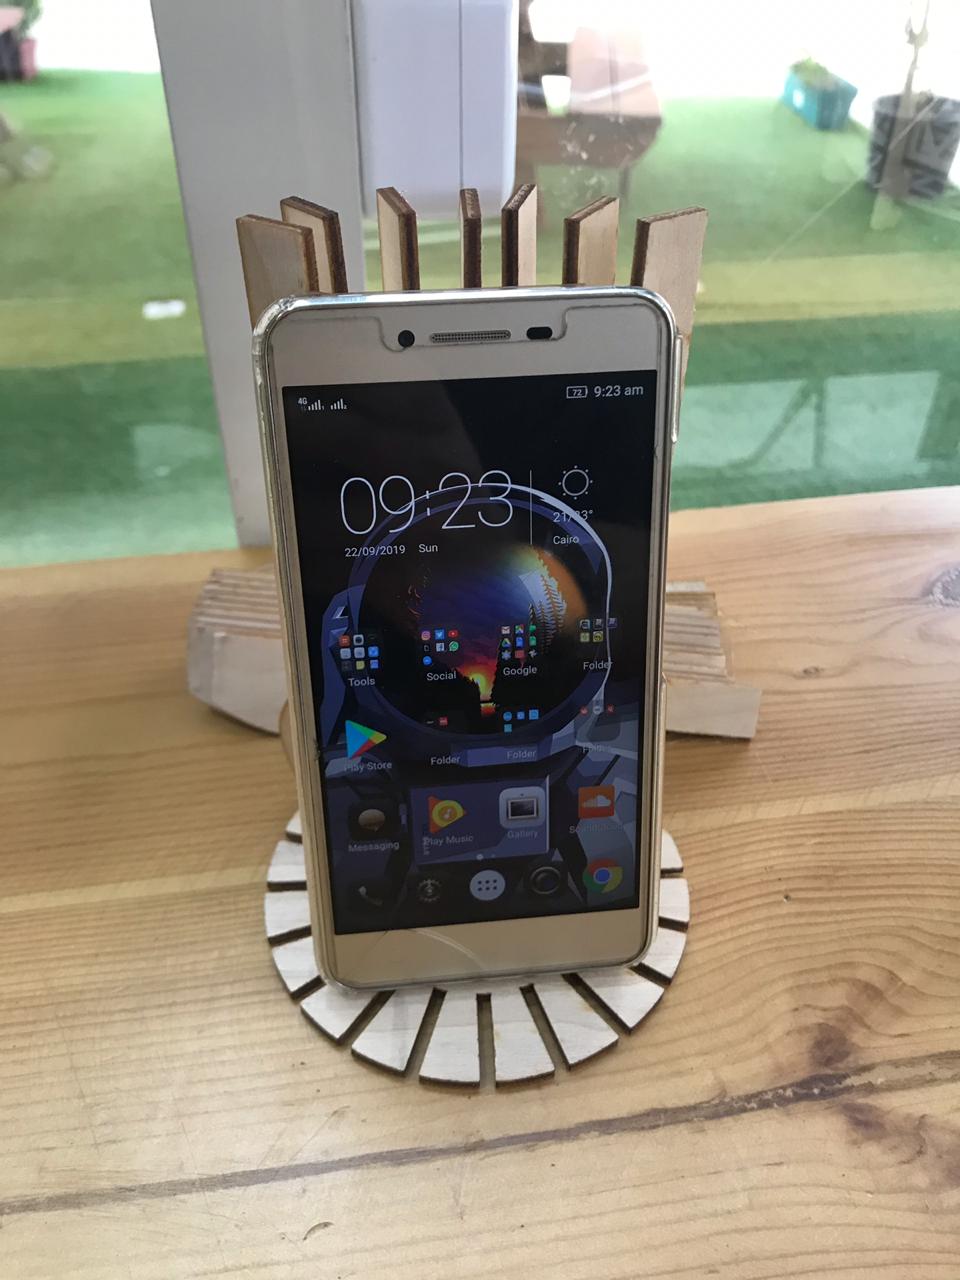
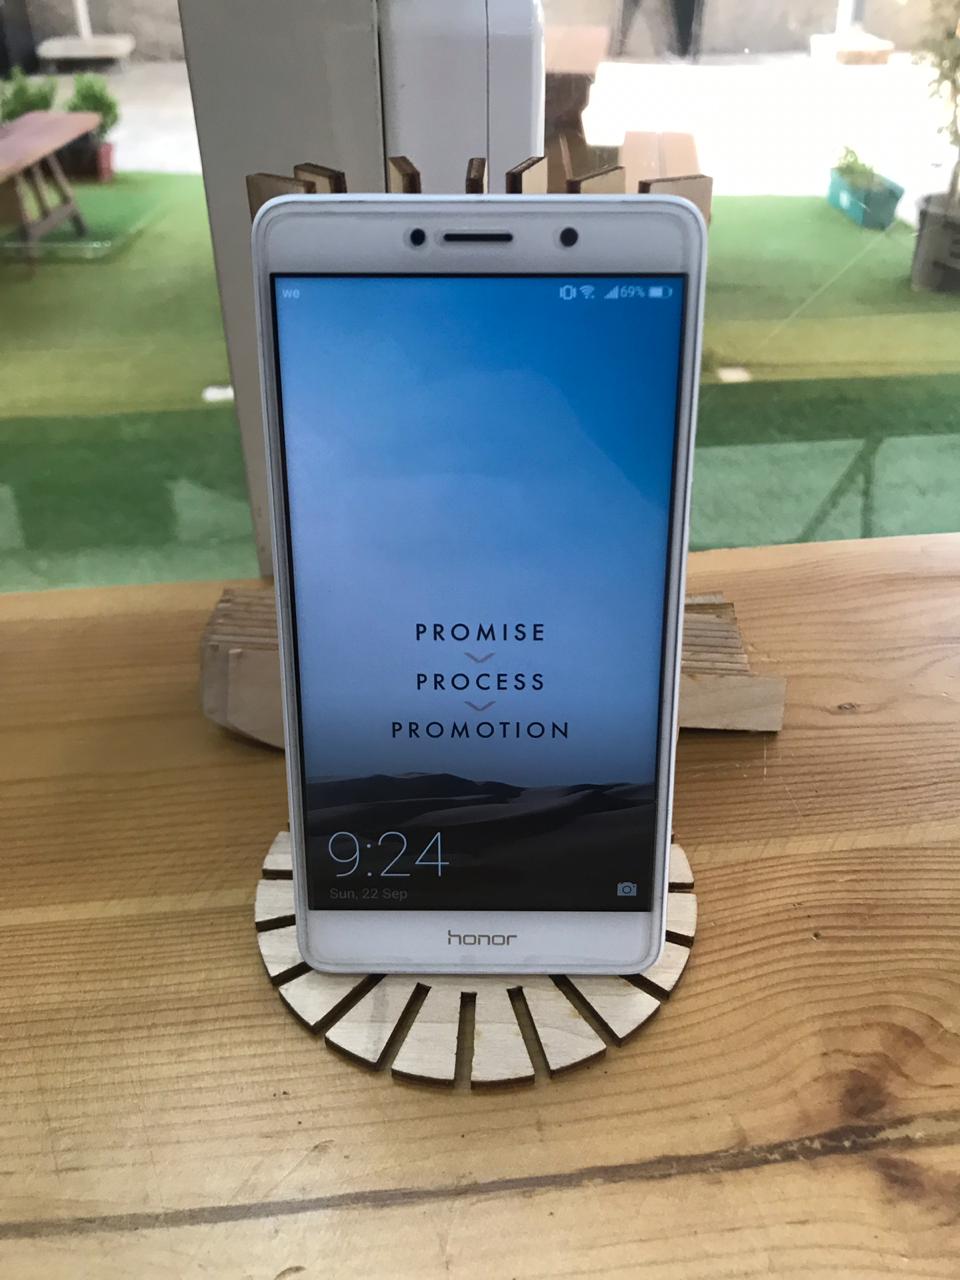
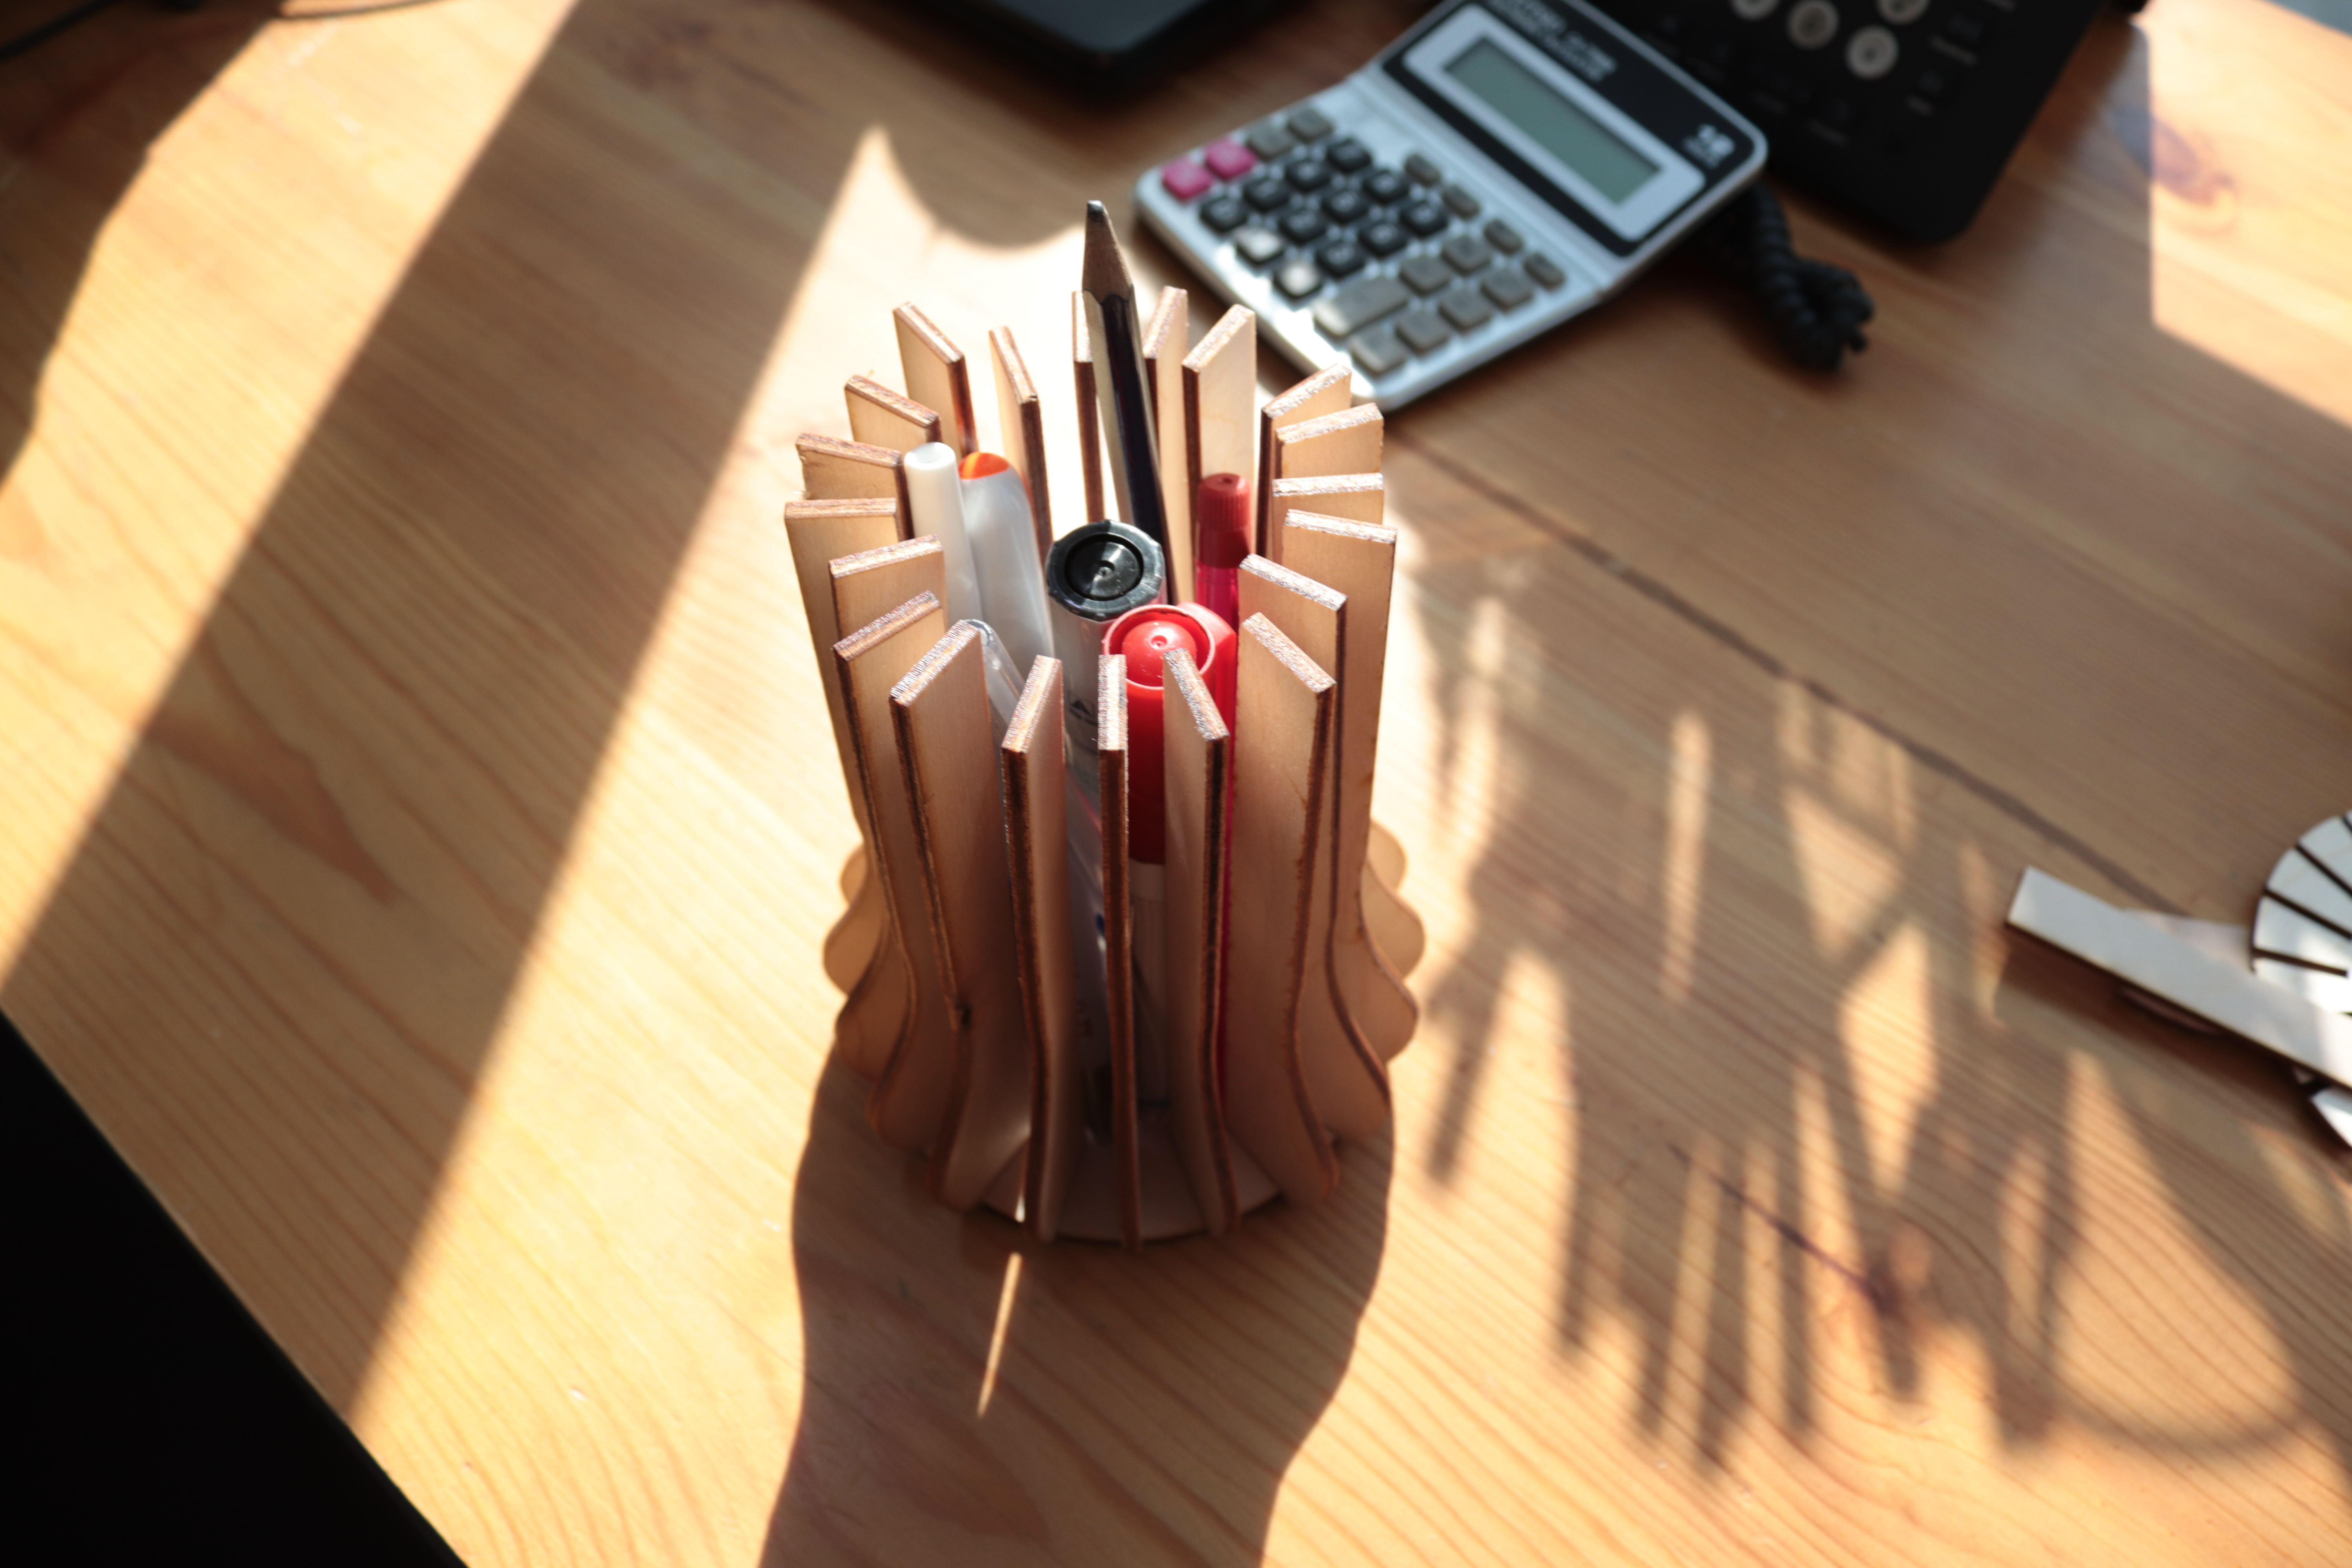
Step 3&4: Creating my press-fit kit
I learn the concept, I know the tools, time now for design, but still I got nothing !! my imagination stuck on a blank page !!!!
In order to solve this problem, I start drawing some drafts and step by step the concept came up to me to create a design that's simple work in both ways and visually looks good.

- Drawing some drafts
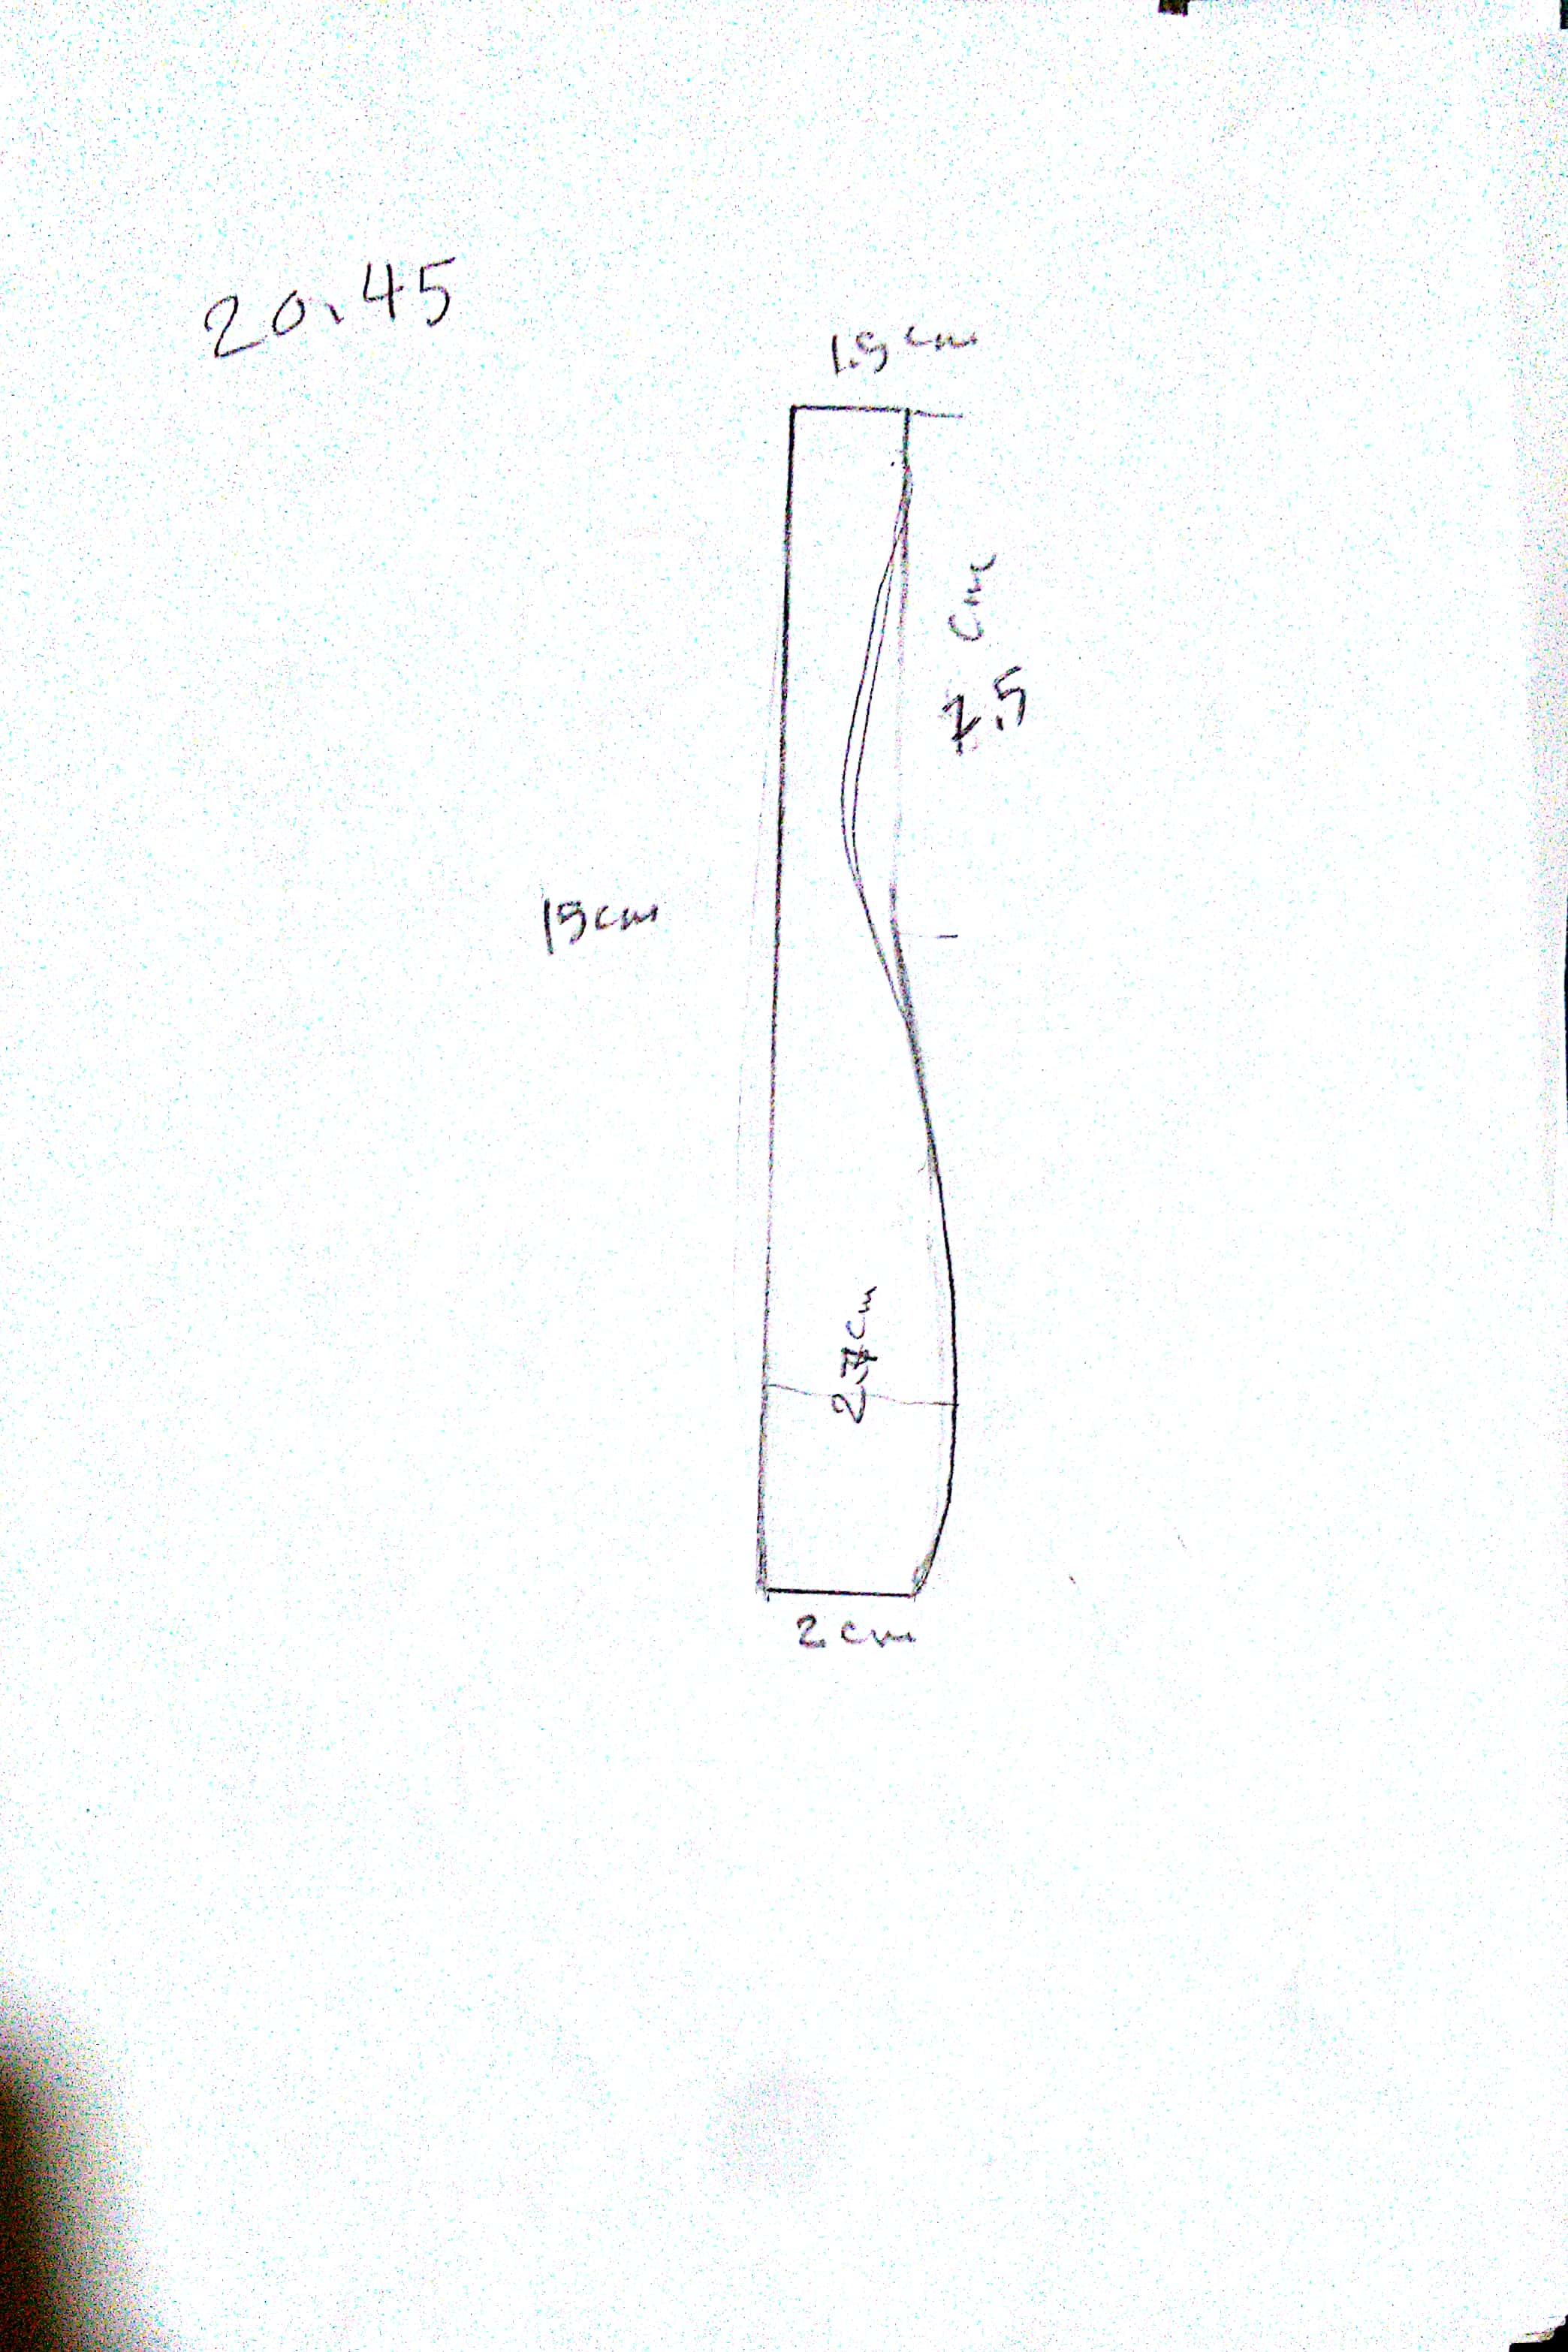
- Put on dimensions
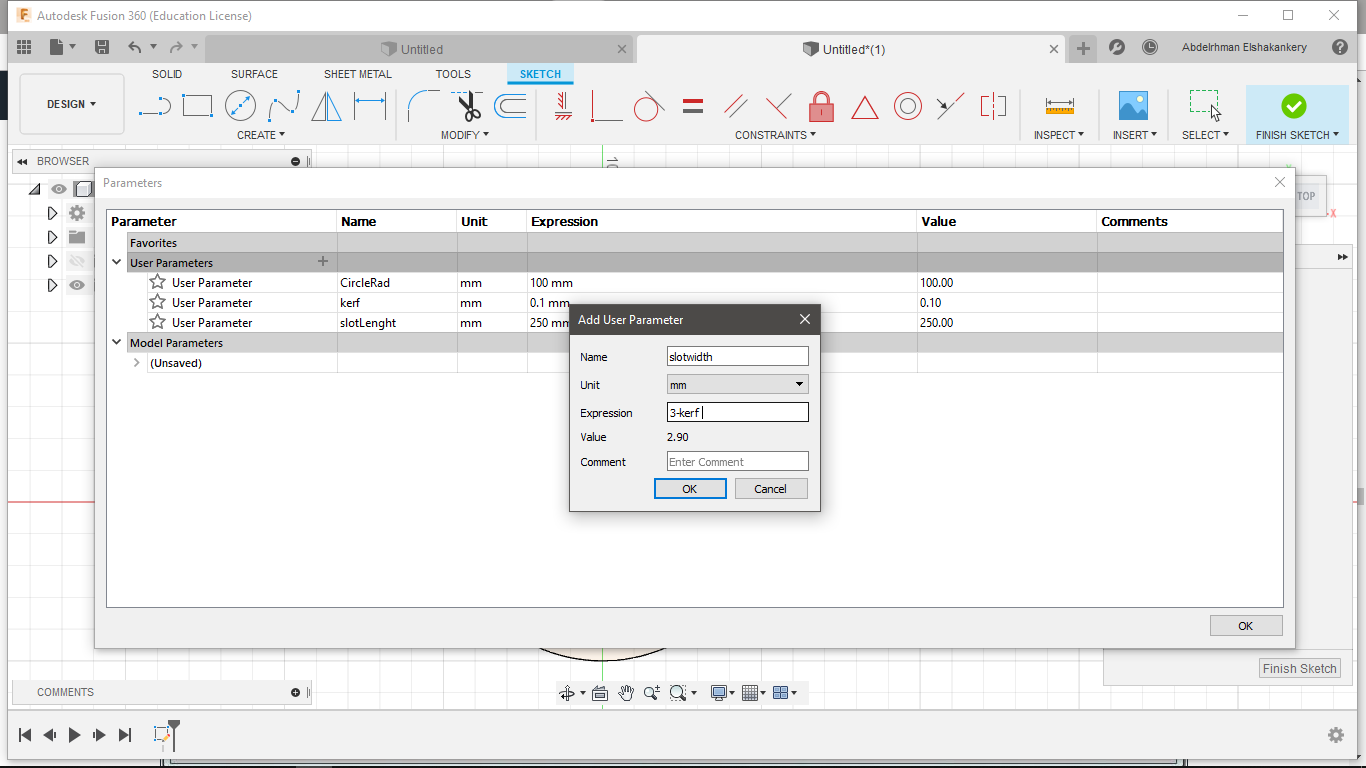
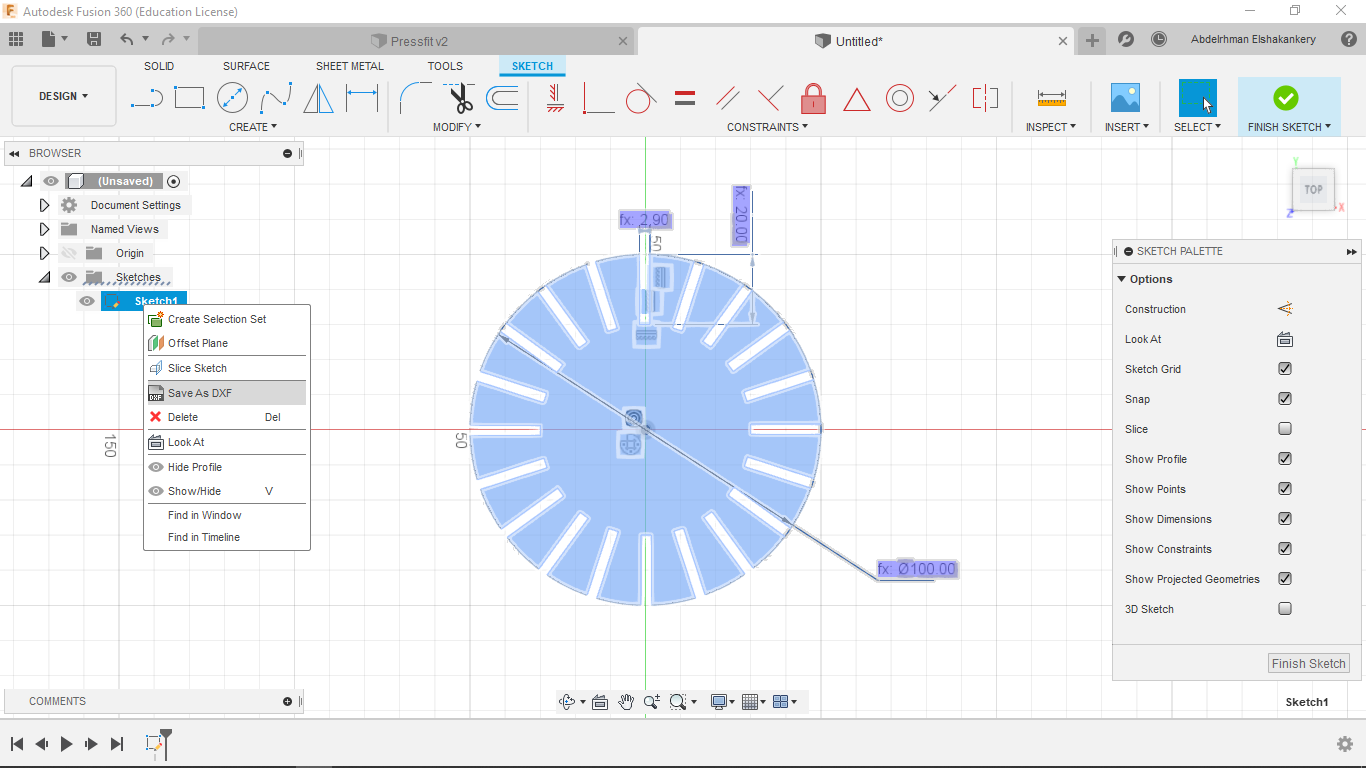
- Add my parametrs in Fusion 360
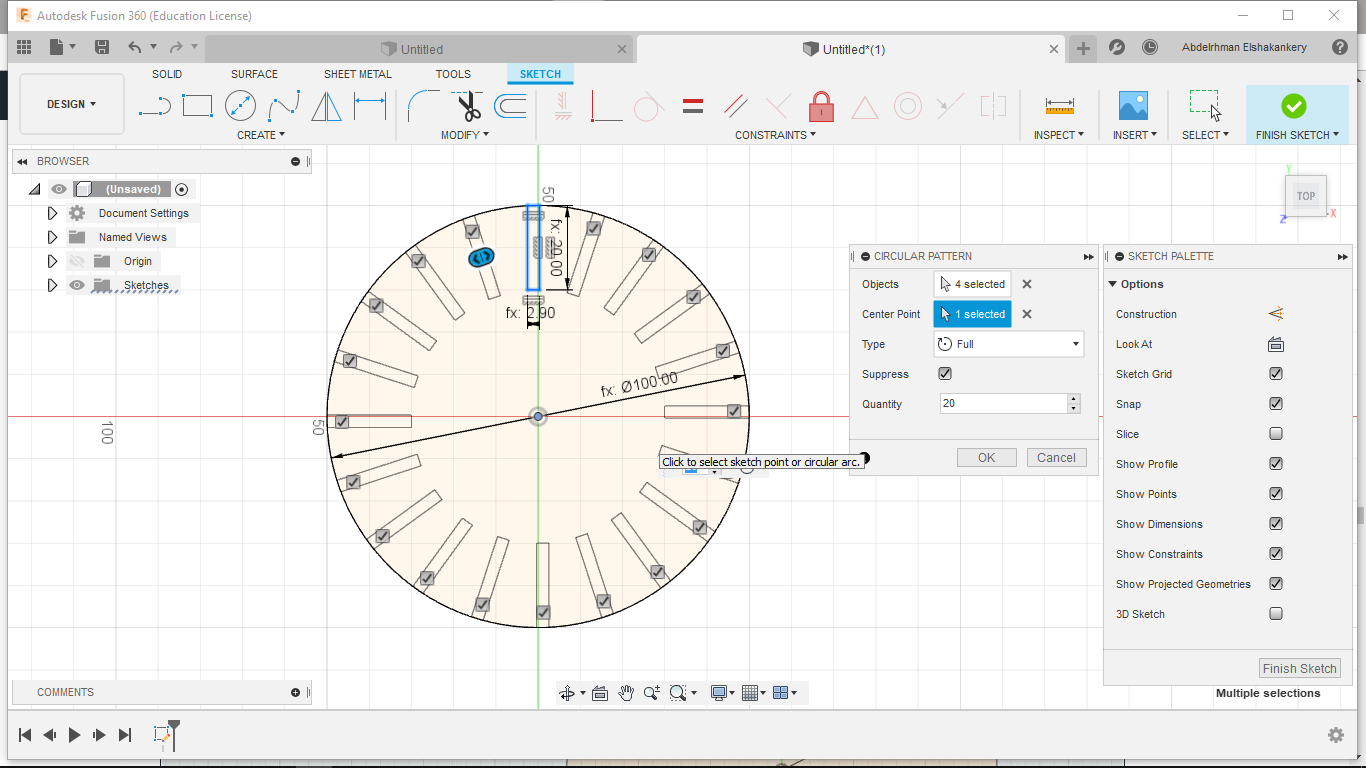
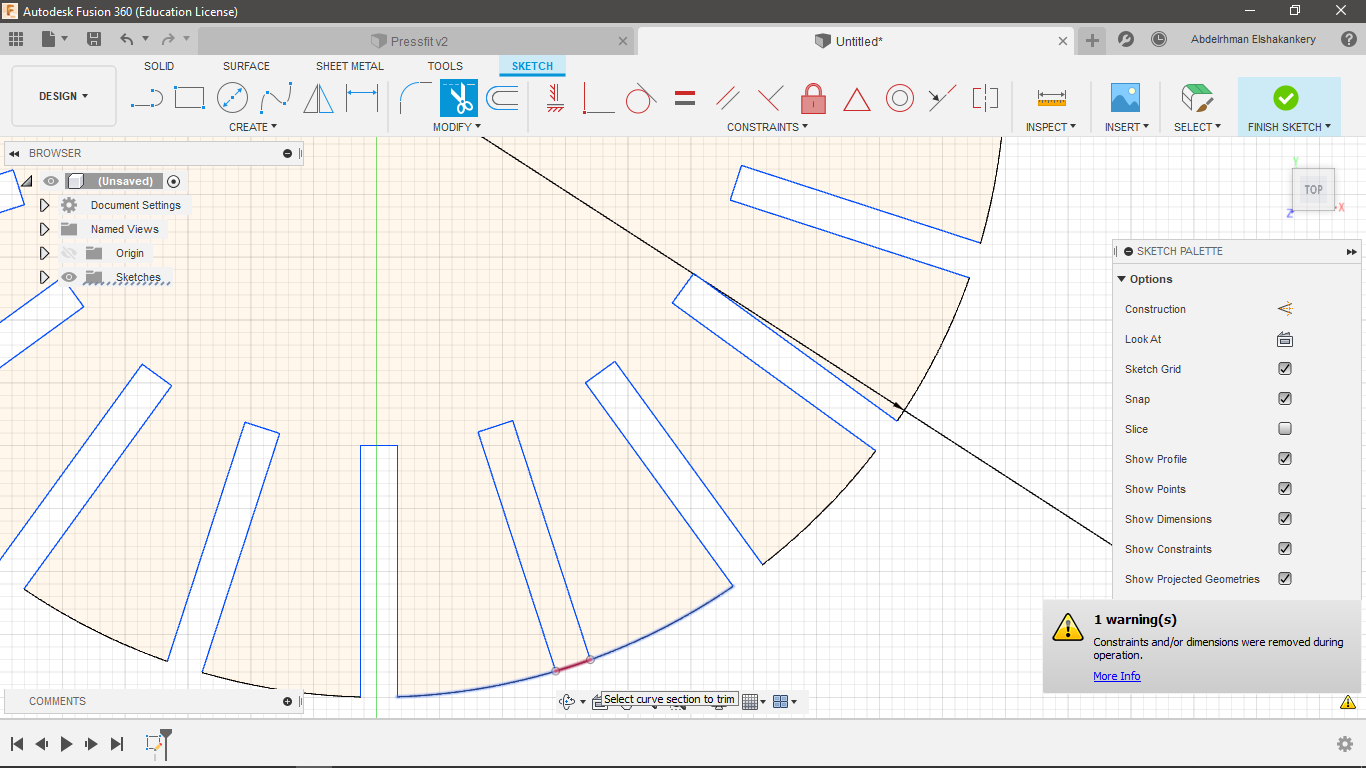
- Drawing my base and creating a circle pattern
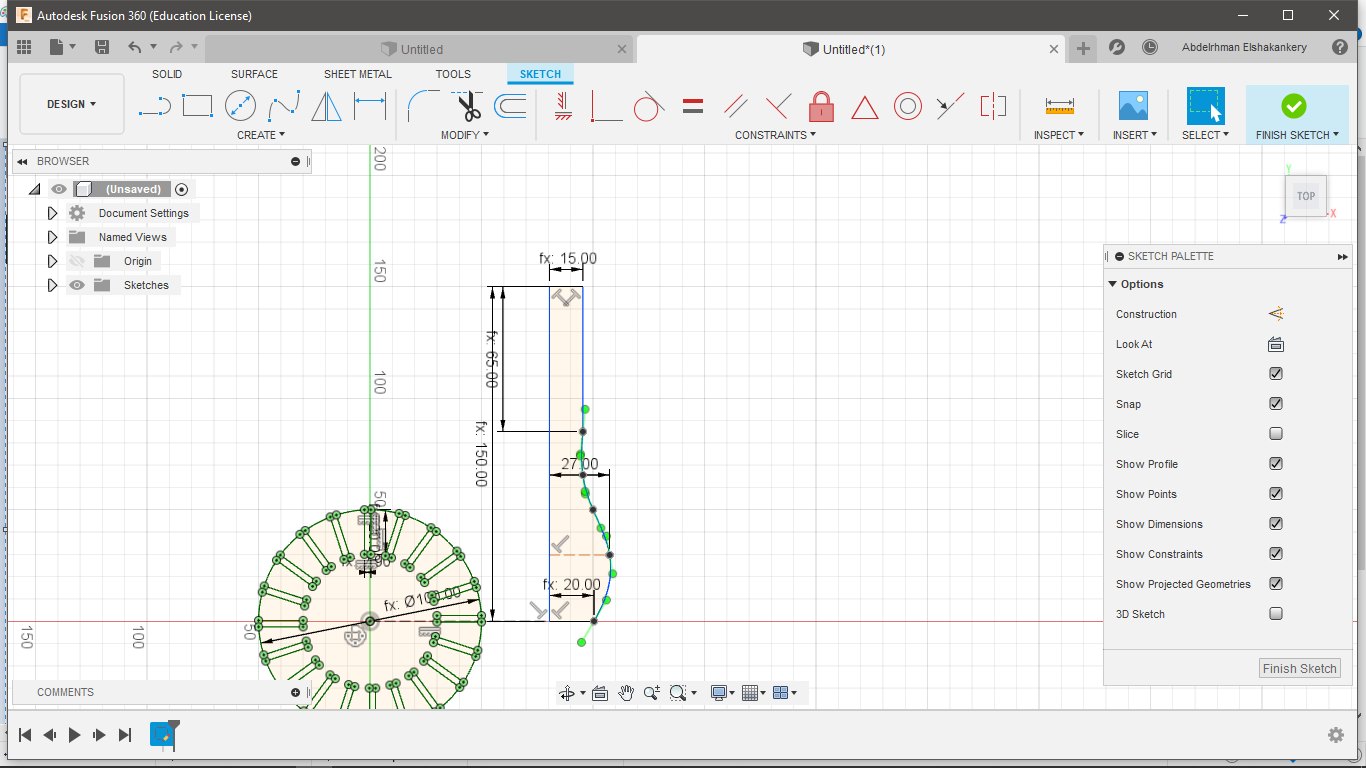
- Creating my second part of the design "BAR"
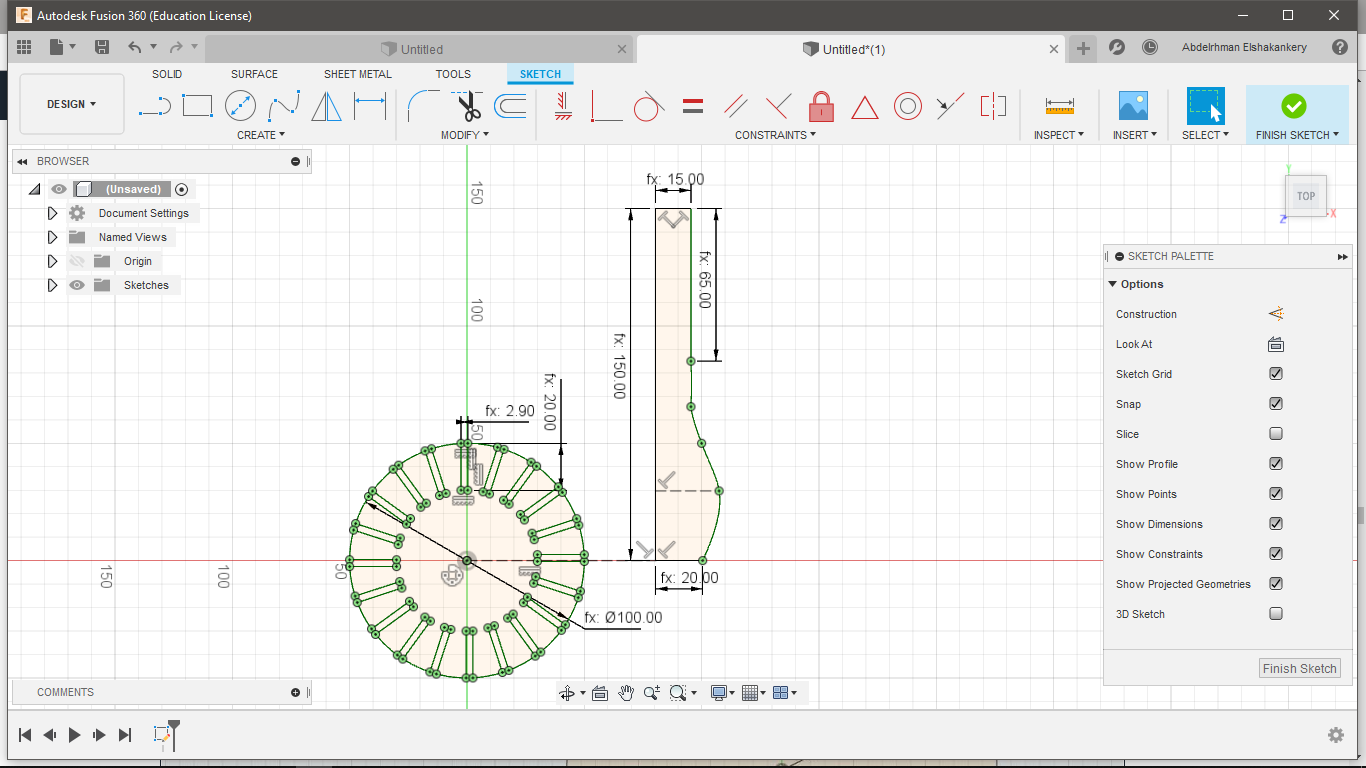
- Make sure everythings is fine "Dimensions&Constrains"
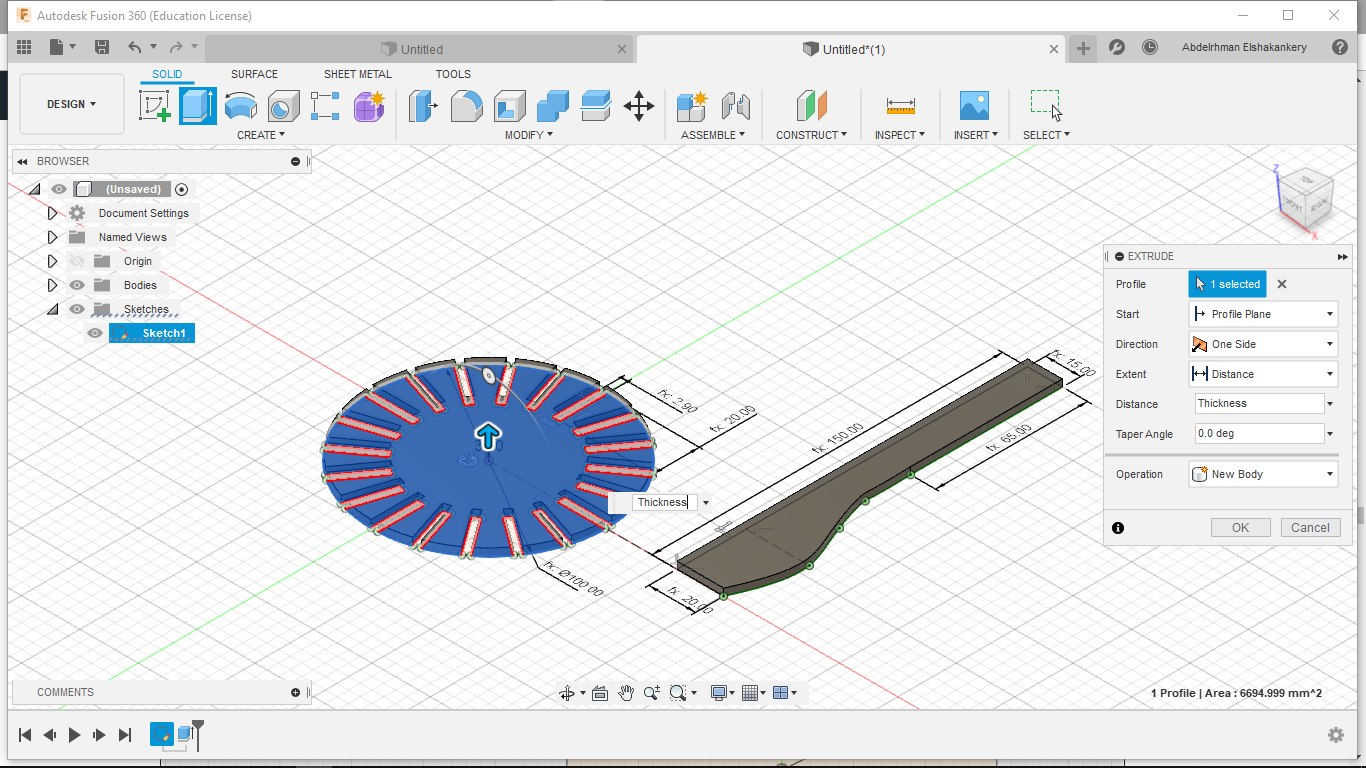
- Time to Extrude
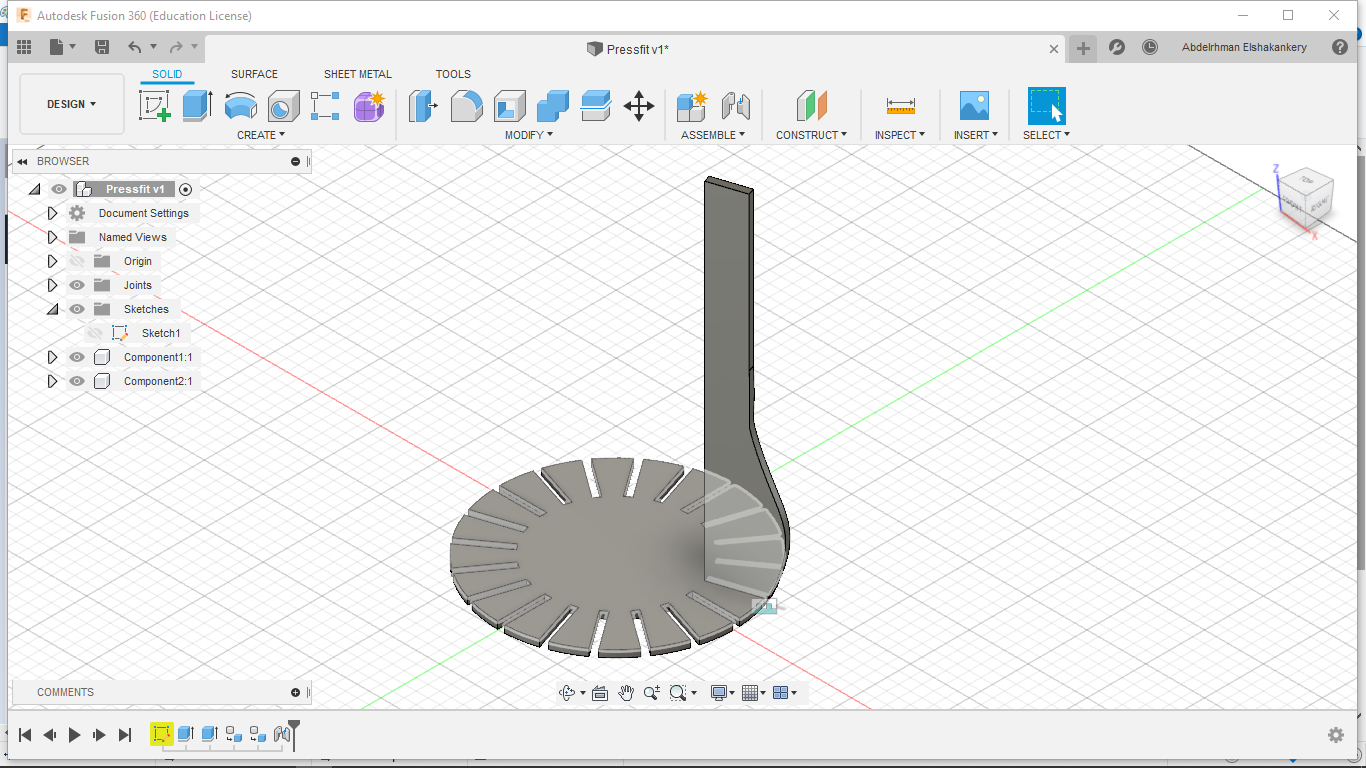
- Assemply For testing
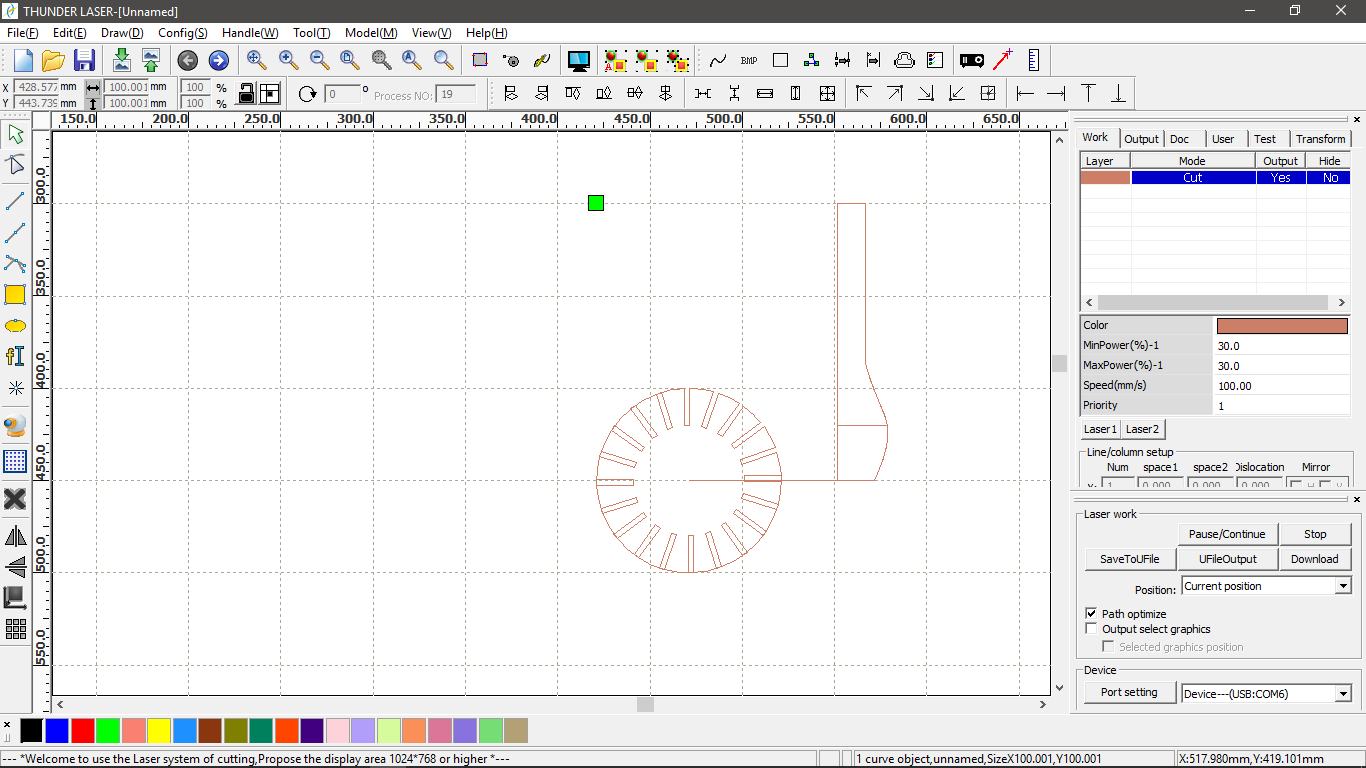
- Now time to go to RD-Works in which I discover that I have a major problem in my design especially the base and the construction line
- Go backe to Fusion to fix my problems by trim the pattern edge
- Make sure everything is okay in RD-works
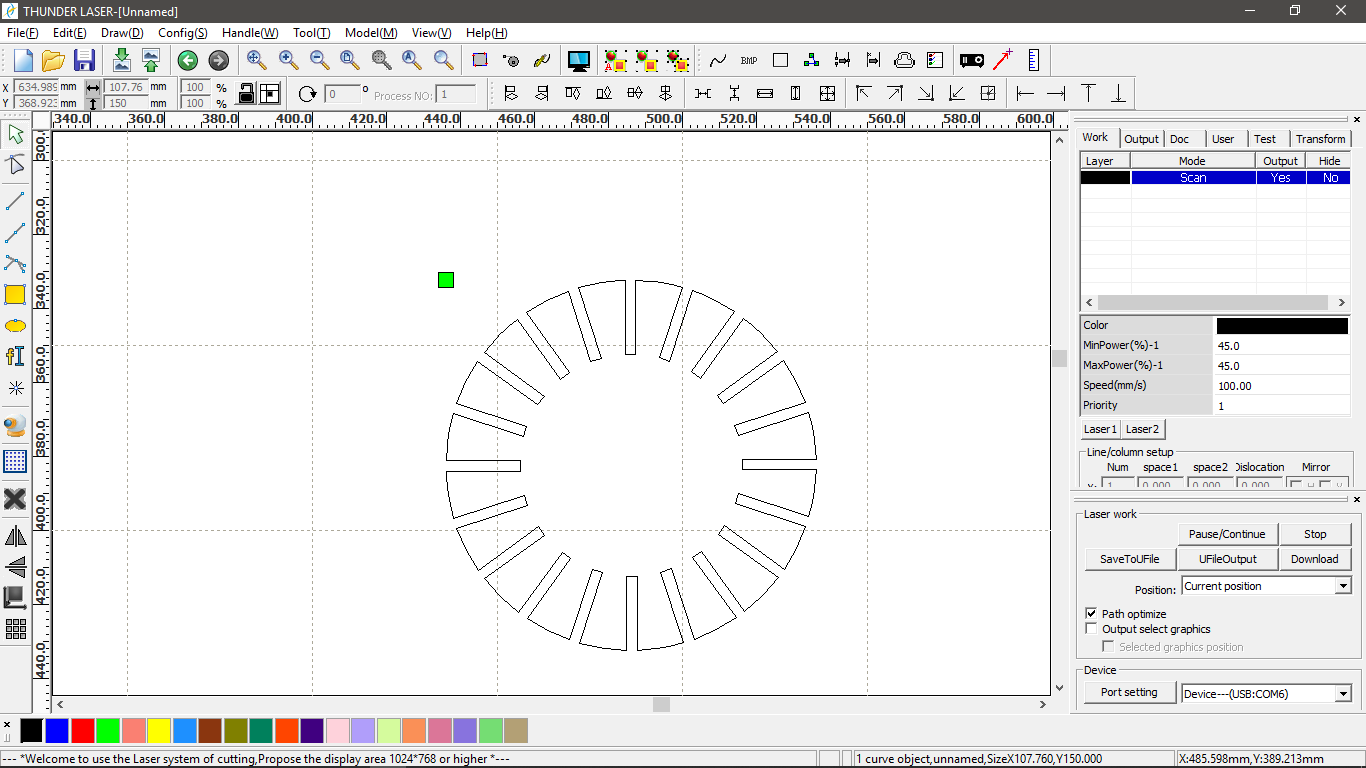
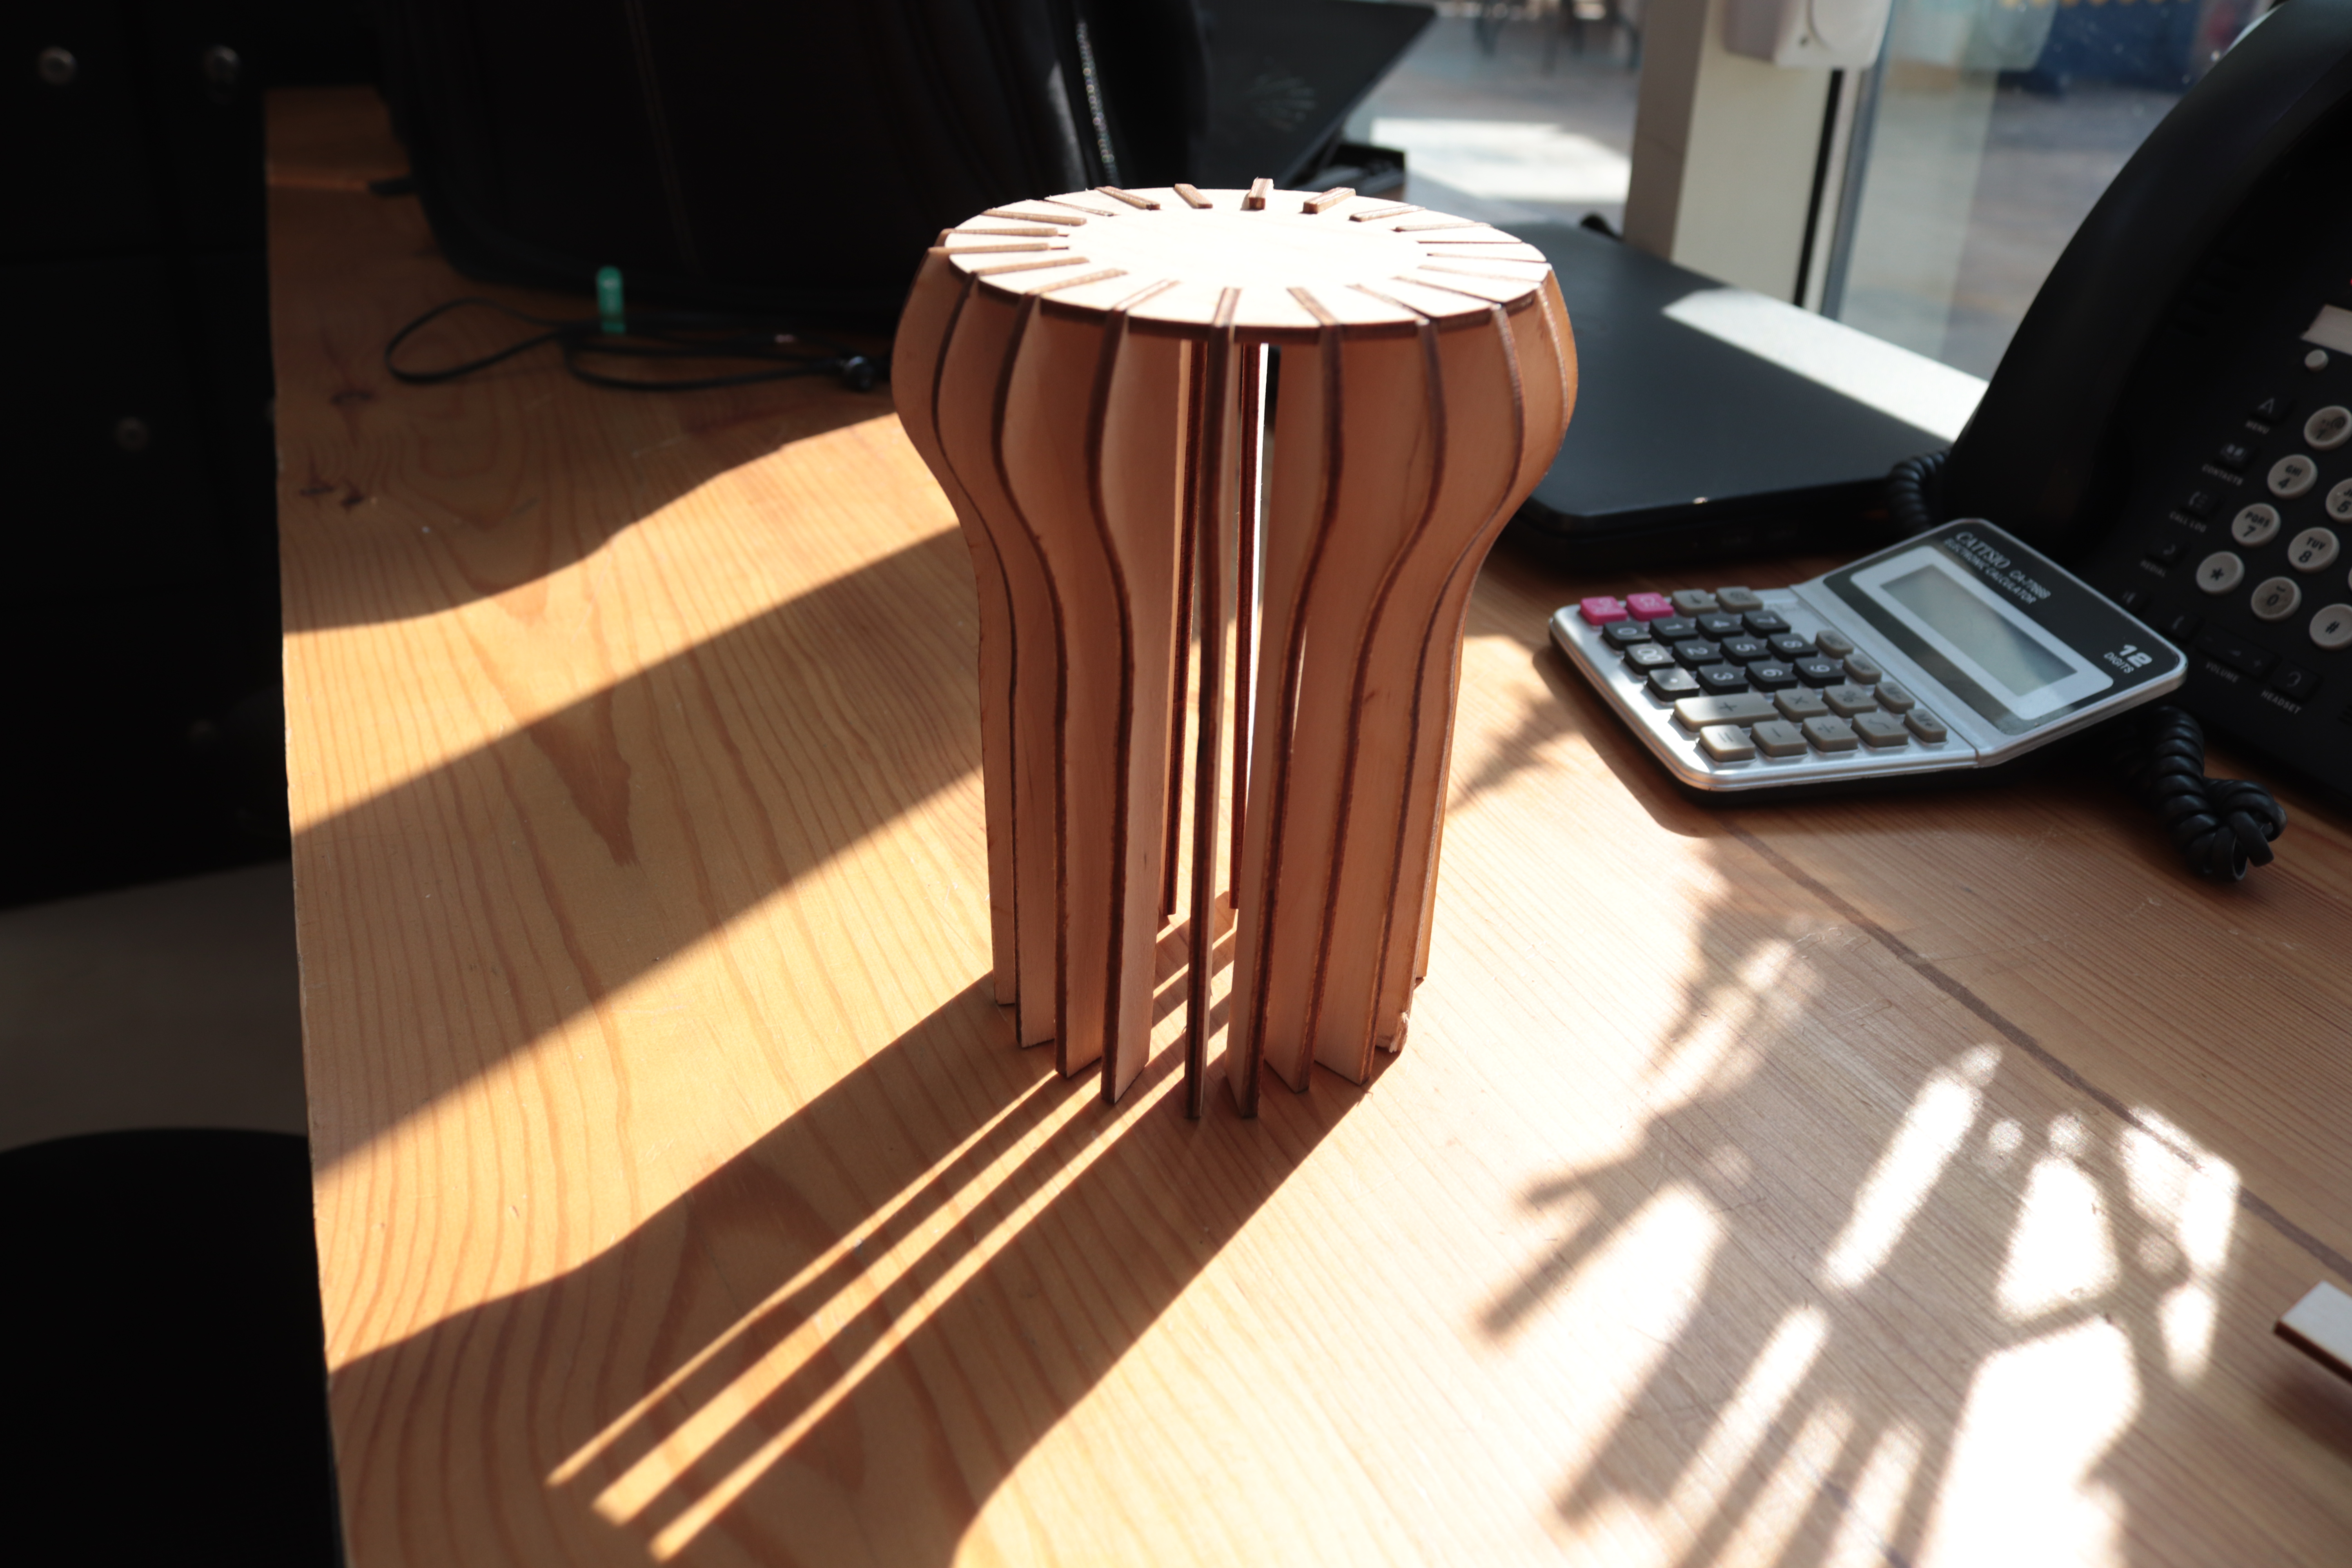
- Now the main body is ready
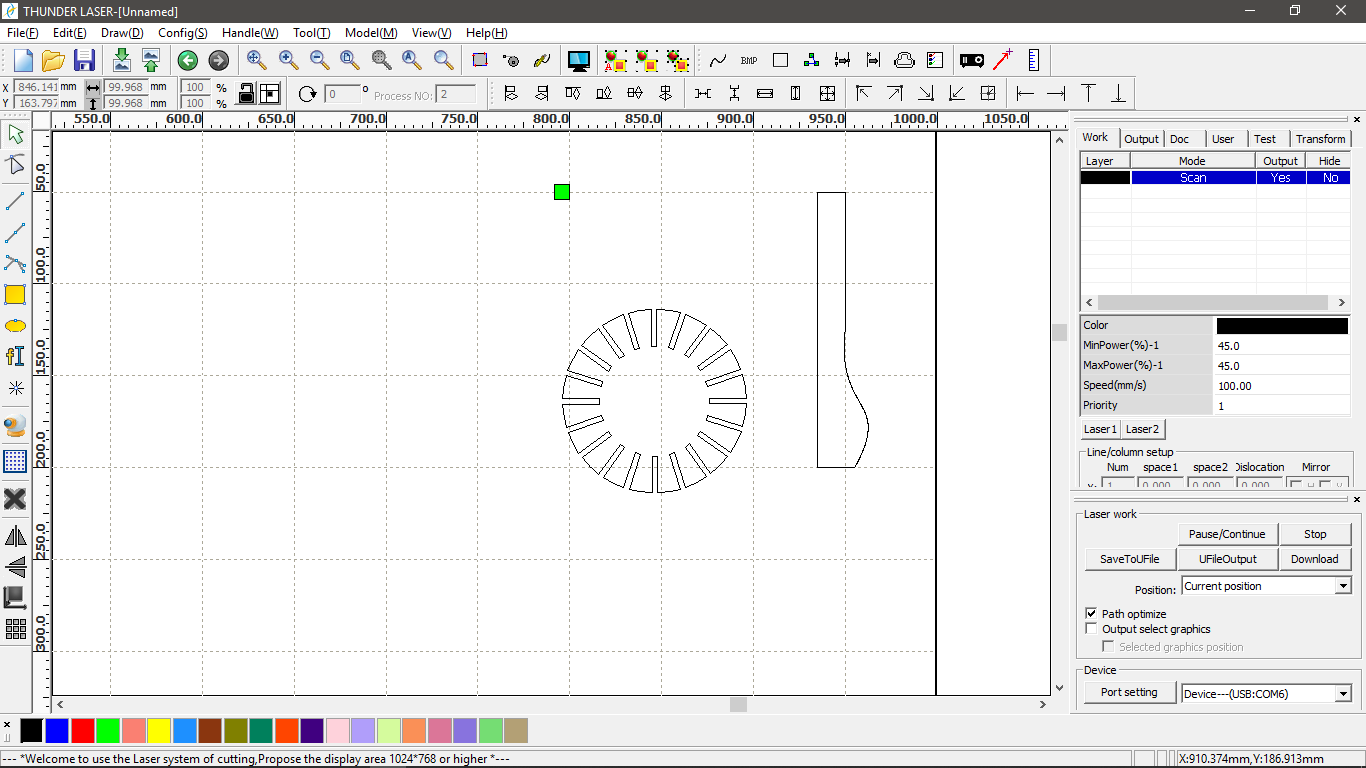
- Final output to cut it on the laser -Power:60, Speed:45-

If you will follow my steps
Do
- Take your time to understand the parametric design
- Start on fab lab academy site
- Draw Drafts and take dimensions into consideration
- Try to make everything connected in your design
- Get familiar with your laser cutter machine
Don't
- Forget that you can change your parameter units as I stuck in my repeat pattern to change
- Focus only the design in Fusion try to think ahead about how it will look in RD-works
- Think only about the kerf not the circle bending ratio